Calculating Distance with Behavior Scripts in Lens Studio

Open a New Project in Lens Studio
We will be using this Lens to calculate the distance between the user and a 3D object placed in the world. That distance can then be used to change the output of objects in your scene.
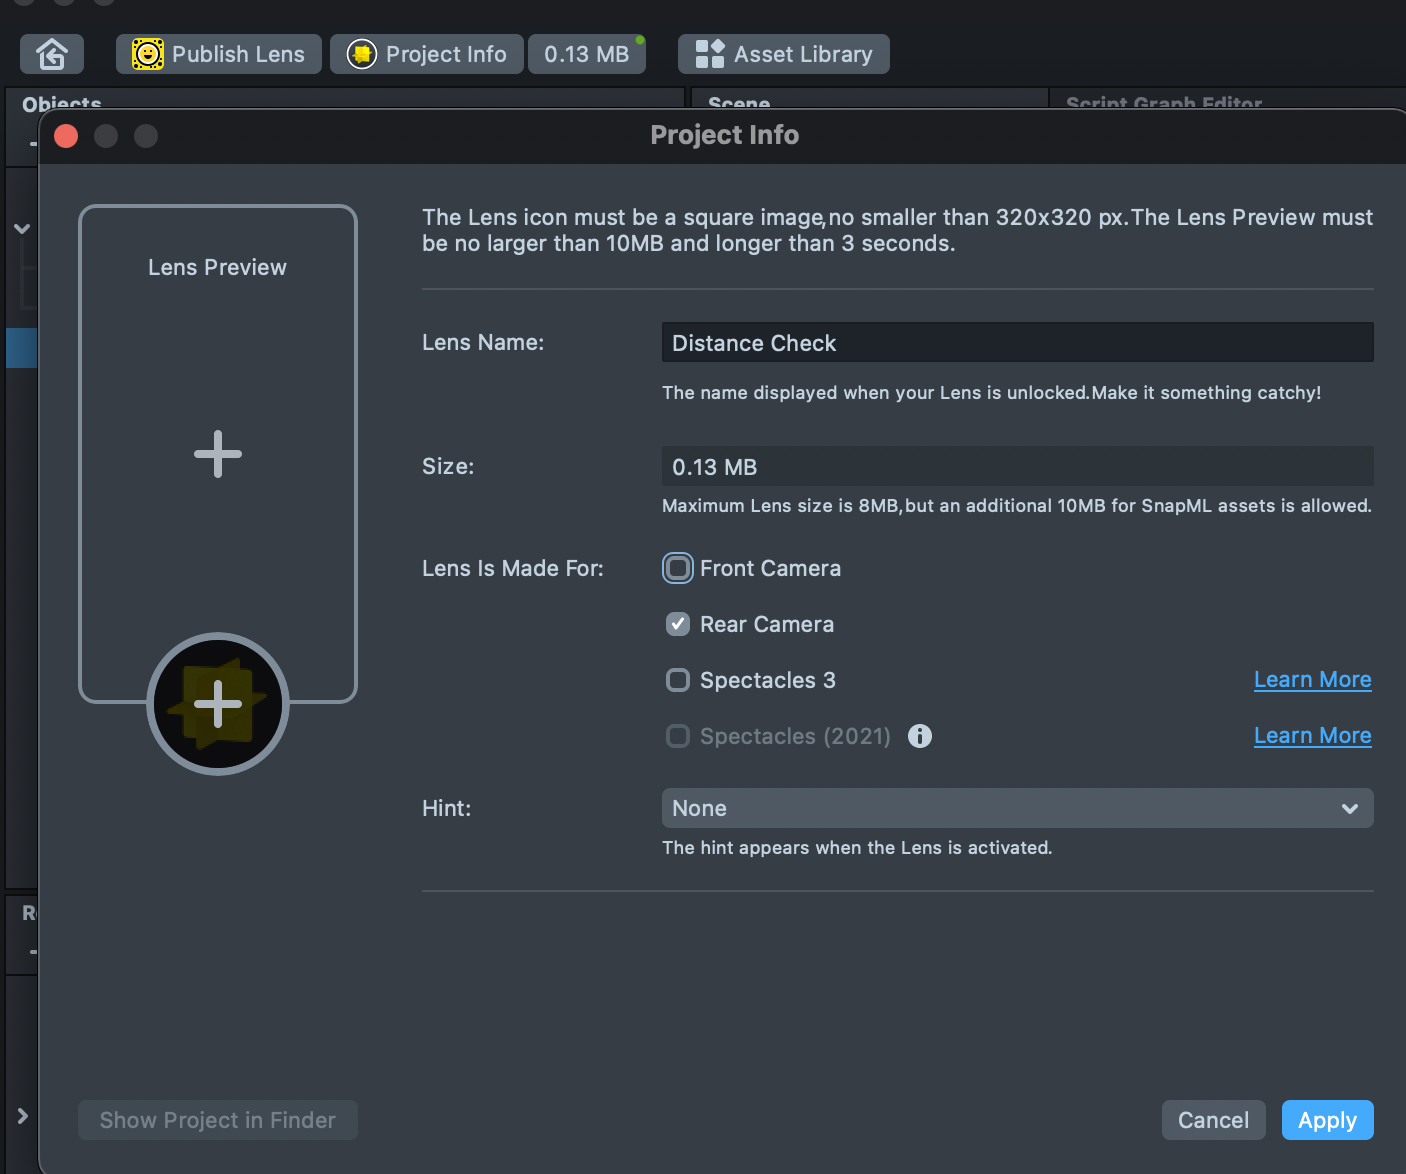
Click the Project Info button at the top-left of the screen and Uncheck the Front Facing Camera option. We will be using this Lens as a window into a 3D augmented world with our phones as the viewport.
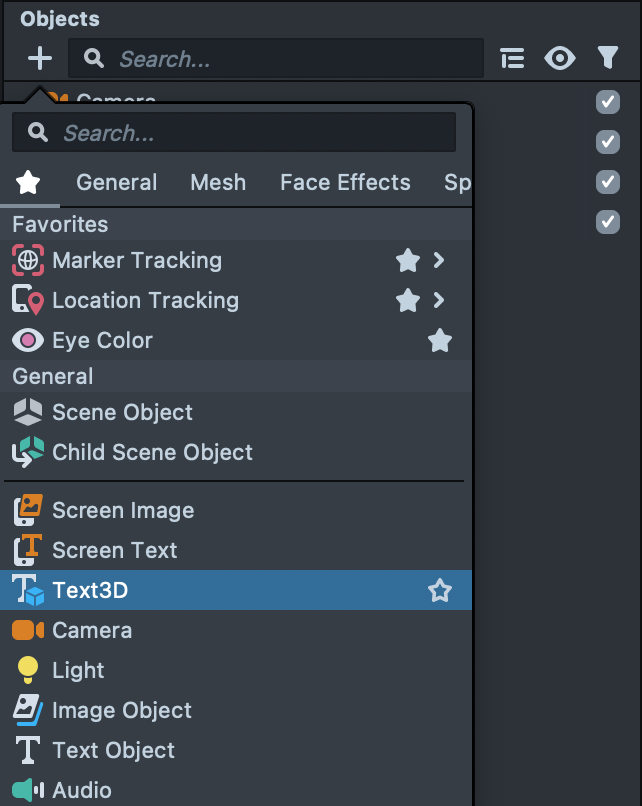
In the Objects panel, click the + create a new Text3D component.
Click + in the Objects Panel and search for World Object Controller under
Helper Scripts.

Click the disclosure button to the left of the newly created World Object Controller and delete the example FBX Object.

Replace the deleted resource with the 3D text component and drag it to the top of the World Object Controller’s hierarchy.

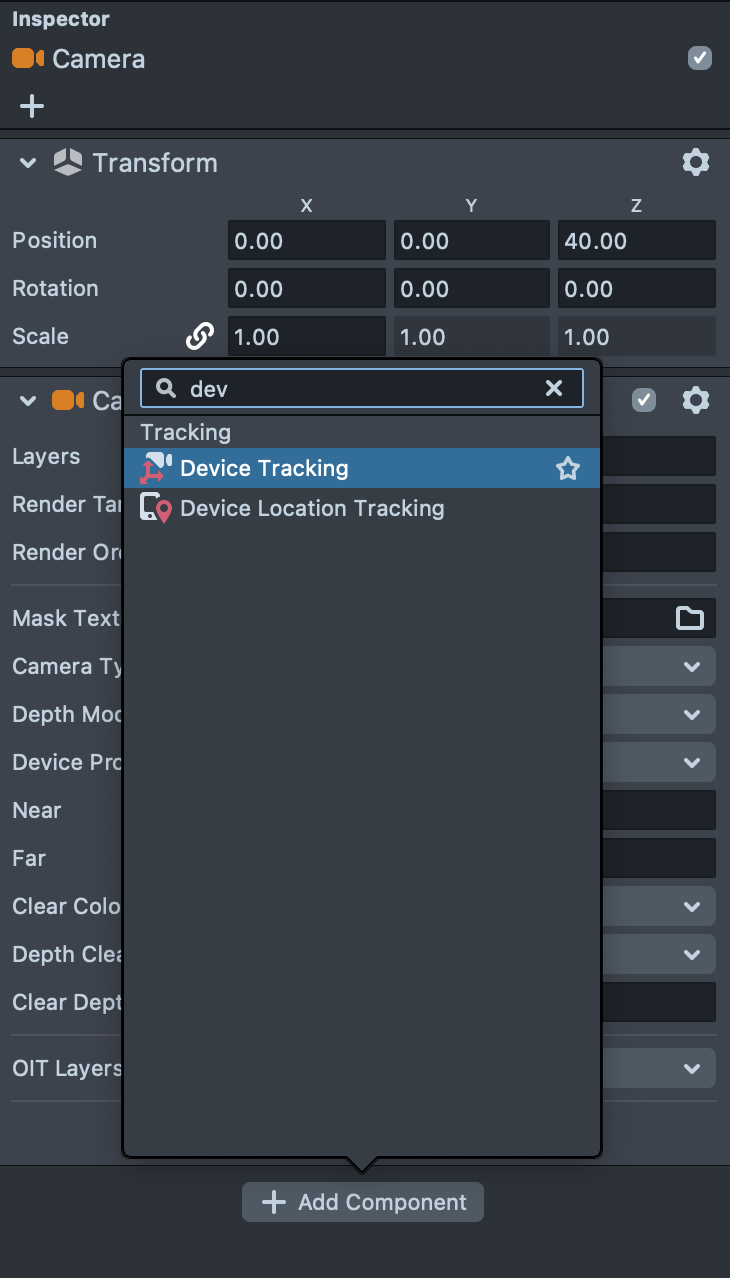
We are going to add a component that will allow device tracking. Select the Camera in the Objects panel. Look for the Inspector and click the +Add Component button to search and add Device Tracking. It will now be added as a component of the Camera.
Back in the Objects panel, click the + to search and add a Behavior Script. It is located under Helper Scripts -> Behavior Script. Drag the Behavior Script over the World Object Controller object to make it a child of the World Object Controller.

In the Scene panel, use “W”, “E”, and “R” to activate the transform gizmos.
“W” – Position
“E” – Rotation
“R” – Scale.
Then move and scale the Text3D so that it sits on top of the green Ground Grid in the scene.
Be sure that your cursor is in the scene panel when you use these shortcuts to avoid renaming your Objects.

Select the newly created Behavior script and in the Inspector, switch the trigger to Distance Check.

Underneath Trigger, set Object A to the World Object Controller. Next, set Object B to the main Camera object that has the Device Camera Tracker component.
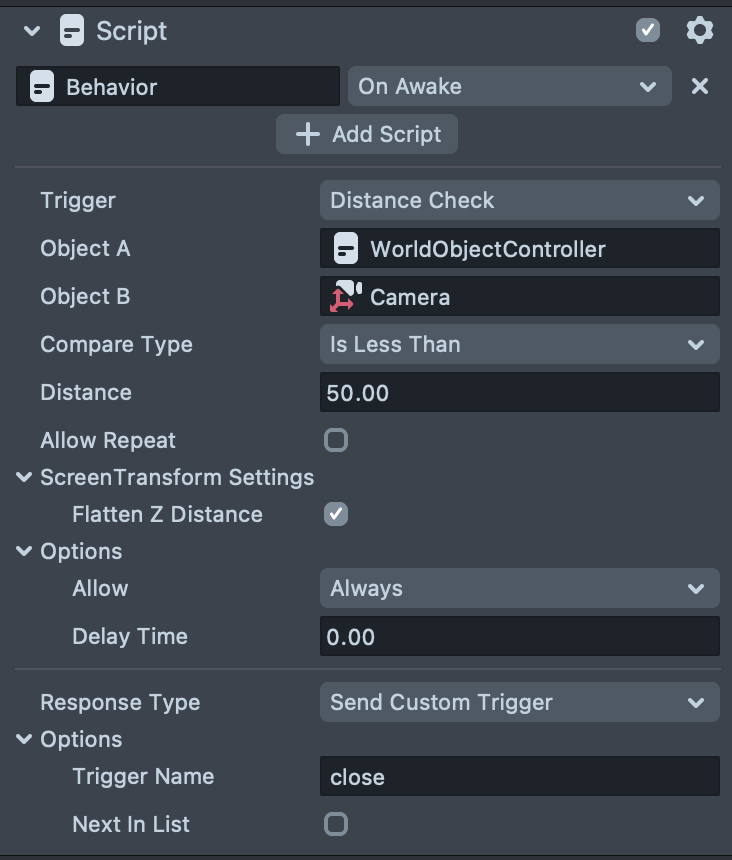
Set the Compare Type to Is Less Than and provide a unit of distance to compare. This example uses 50.0. You may have to play with these numbers depending on your space.
Under the Response Type drop down box, select “Send Custom Trigger” and set the Trigger Name to “close”.

Then right click on the Behavior script component and duplicate it.
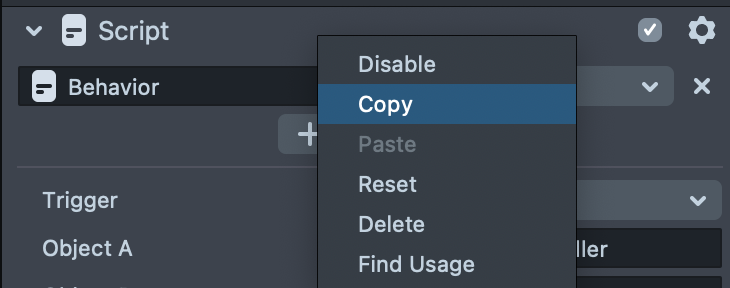
Paste the copied Behavior script below and set the Compare Type equal to Is Greater Than and rename the Trigger Name to “far”.

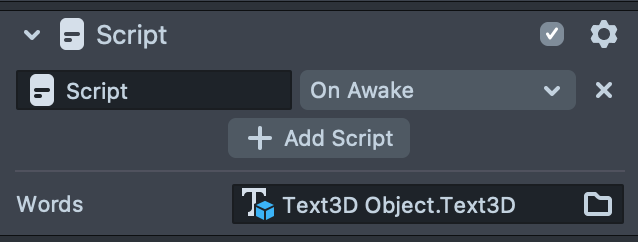
Now create a new Script in the Resources Panel and attach it to the Behavior Script object. Drag it below where our two Distance Check Behavior Scripts are located.

Double click the newly created Script in the Resources window to open the Script Editor. Start by adding a new component input with the following code. This will allow you to drag in the 3D Text Scene Object to be changed within our script.
//—–JS CODE—–
//@input Component.text3D words
The //@input adds access to any type of Lens Studio component. So to access a Text3D component, you would have to declare the type (Component.text3D) and then name the variable you’ll be referring to in your project (words). Save the script and there will be an input on your script.
The Behavior Scripts that we are using to check distance have a method to receive the custom triggers they are outputting when the Distance Check conditions are met. You can double click the Behavior Script in the Resources panel and parse through the various methods included in the Behavior Script For our case, we are interested in addCustomTriggerResponse() method.
Go to the Resources pane and open the Scripts Folder under the World Object Controller to double click and expose the code of the Behavior Script.

Let’s extract this line and copy it into the script with the 3D Text component so we can make changes when either of the distance check conditions are triggered.
This method looks for the custom trigger with the same name as the “triggerName” and runs the function callback when that trigger is active. As you are bringing in the distance check behavior scripts, make sure to match the triggerName to the trigger name from the Behavior scripts. This value is passed in as a “string”.
Then set up your callback functions in the same script. For simplicity, you can name your callback functions the same as your custom trigger names. Because we have the 3D Text component input, we can set the text for the 3D object with either of these functions that are called when the custom trigger is sent.
Example Code:
//@input Component.Text3D words
global.behaviorSystem.addCustomTriggerResponse(“close”, close);
global.behaviorSystem.addCustomTriggerResponse(“far”, far);
function close() {
script.words.text = “close”;
}
function far() {
script.words.text = “far”;
}
Finally, preview the effects in the Preview Pane by selecting the environment in the upper part of the window.
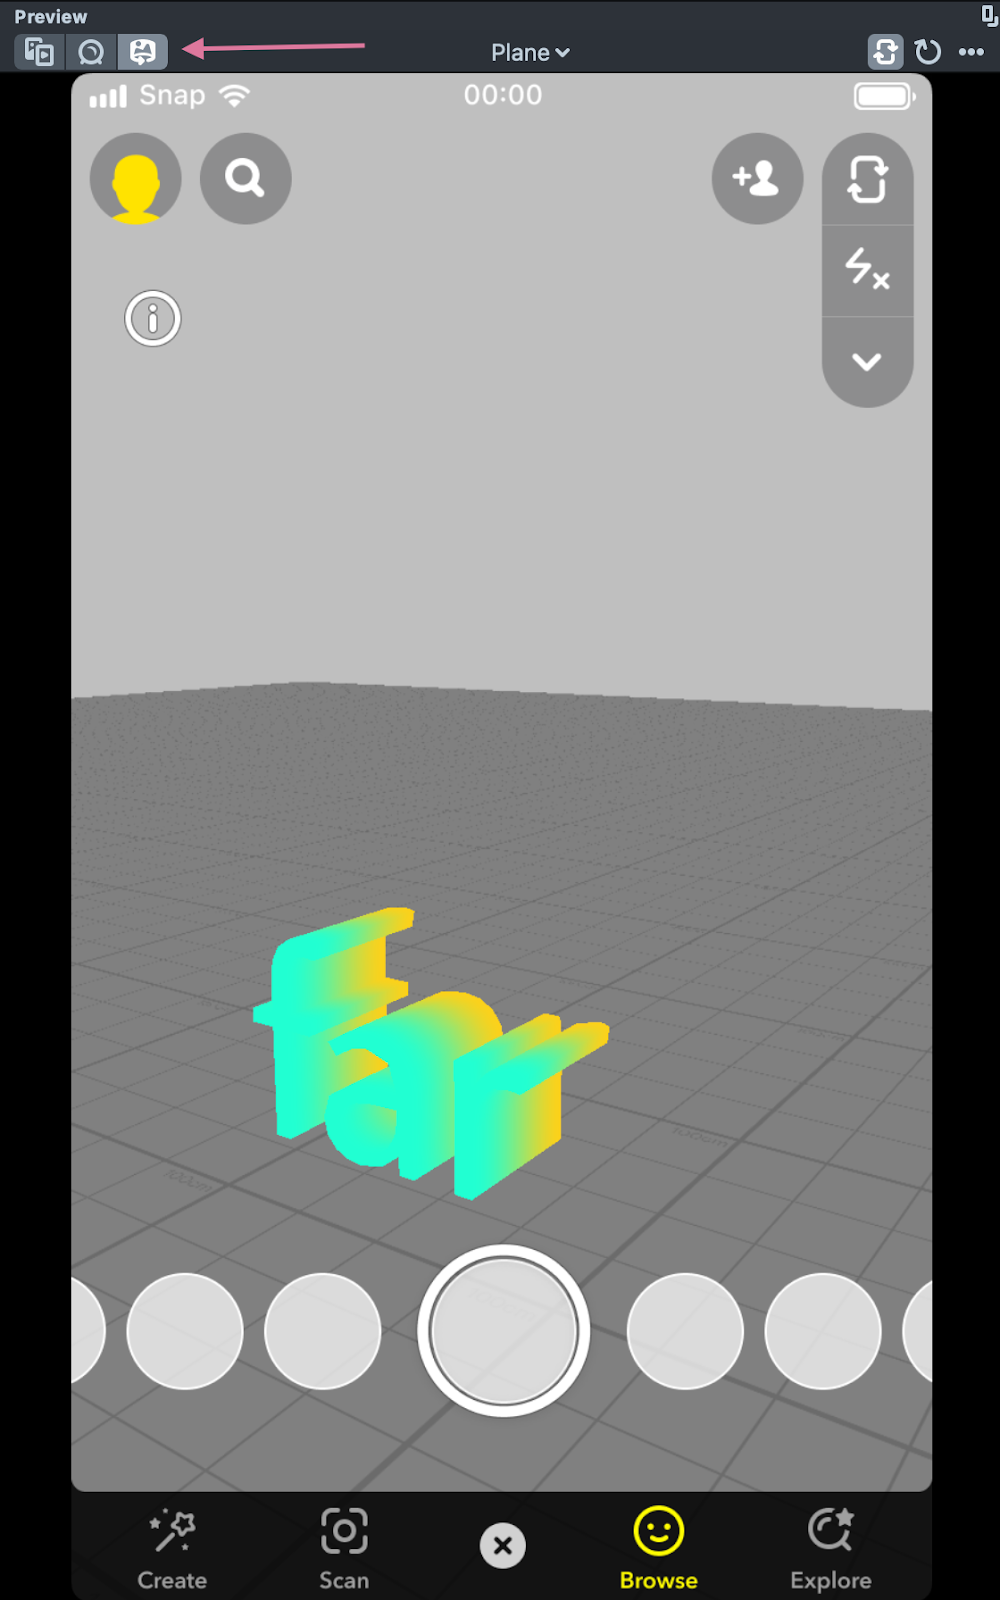
You can also pair your Snapchat account and send the Lens to your device.

The Text3D Component is just one of many possibilities able to be controlled with Behavior Scripts. Look through all of the Triggers on the Behavior script to see what else you can control!
Tags:
snapchat, lensstudio, augmentedreality, ar, nyu, idm, integrateddesignandmedia, newyorkuniversity, nyuar, mobilearlab, tutorials, script, javascript, behavior, filters, arprojects, easyarprojects, easyar, augmented, 3d, condition, distancecheck, seestrawrun, christopherstrawley, augmentedrealitytutorials, mark skwarek
Behavior Scripts Lens Studio__Mobile_AR_Lab__NYU
by Christopher Strawley